Looking to install your Addictive Desert Designs TRX Rear Bumper? Here's a step-by-step guide on how to remove the OEM rear bumper from your Ram TRX.
Preparation:
- Disconnect the negative battery terminal. Park the vehicle on level ground and set the emergency brake.
- We recommend reading through these instructions in whole before performing the work.
You will need the following tools:
- Ratchet
- 10mm Socket
- 16mm Socket
1. From underneath the driver's side of the vehicle, unplug the main bumper harness connector. (Fig A)

2. Unplug the connector on the back side of your trailer plug. Then, remove the trailer plug from the OEM bumper by pressing in the tabs on the back side of the plug and pushing it out the front of the bumper. (Fig B)

3. Remove the two plastic clips that sit behind the license plate. (Fig C)

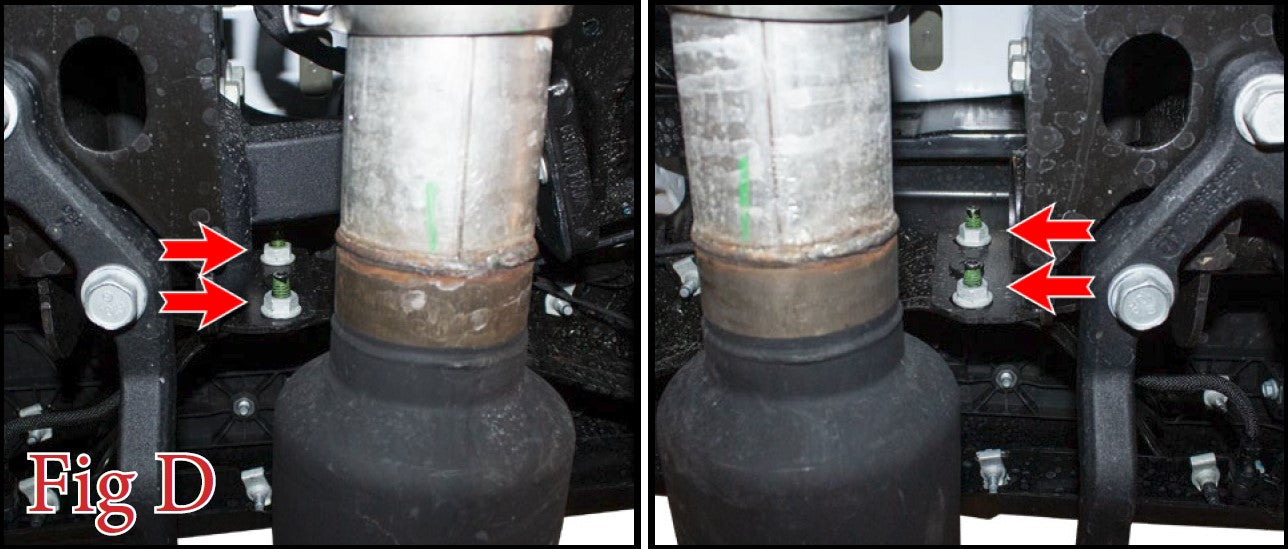
4. From underneath the vehicle, use a 16mm Socket to remove the two bumper mounting bolts (per side). Then, remove the OEM bumper from the vehicle. (Fig D)

5. Remove the two plastic clips referenced in (Fig E). Then, remove the module from the bumper.

6. Squeeze in the two metal tabs referenced in (Fig F). Then, remove that module from the bumper.

7. Remove the parking sensors from their mounting rings by spreading the two tabs on the back side of the mounting rings. Keep track of what position/orientation these come off the OEM bumper so you can install them on your new bumper in the same position/orientation. (Fig G)

8. Using a 10mm Socket, remove the bolt (one per side) that holds the license plate lights into place. Then, remove the license plate lights. Save these bolts for reuse. (Fig H)

Now you're ready to install your aftermarket TRX rear bumper!


Leave a comment